 I am amazed by fax machines. I know fax machines are old fashioned, but I am still somehow surprised when words automajically jump from one page to another.
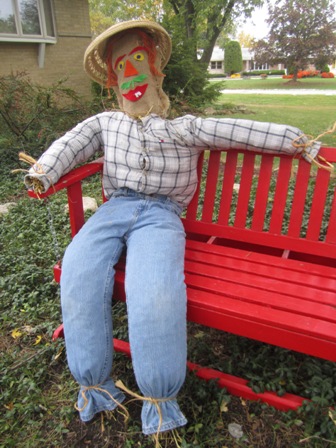
I am amazed by how many people have never made a scarecrow. I know scarecrows are old fashioned, but I am still somehow surprised how many people need instructions at our Elk Grove Garden Club Scarecrow Factory.
Let the voice of experience help – that’s me! After 10 years of running a Scarecrow Factory, we have this down to a science.
One key factor to consider is stuffing material. Hay v. straw v. plastic bags. Hay and straw are certainly traditional, but can play havoc with allergies. Of those two, straw is BY FAR the better choice. Scrunched up plastic bags work well too, and the scarecrow can be stored for the next year.
As far as clothes, let your imagination run wild, keeping a few points in mind. Non-stretchy is best. Scarecrows wearing a sweatshirt tend to turn into a lumpy bumpy wet sloppy mess. Overalls are perfect as they negate the tricky step of attaching the pants to the shirt. Kids like to make kid size scarecrows. Footed sleepers are quick, easy, and fun.
- Clothes – Non-stretchy shirt and pants
- Hat
- Accessories are fun (gloves, belt, silk flowers in a pocket)
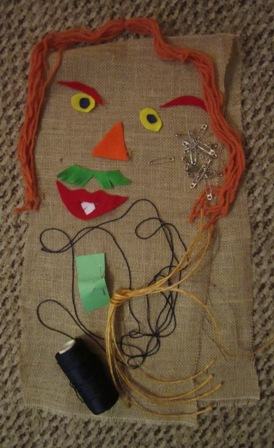
- Burlap for the head (two pieces at 12″ x 20″)
- Felt pieces for eyes, ears, noses
- Hot glue (other glues tend to dissolve in bad weather)
- Twine – 5 pieces, each about 1 foot long
- Straw or plastic bags (one regular size bale will make about 5 scarecrows)
- At least 10 large safety pins
- Big needle and thick strong thread
Optional
- A tarp to contain the mess
- Wood for the arms, to support the head, and/or for standing, and a little more twine.
Now have some fun!
1. Sew the head on three sides. You need the bottom open for stuffing. Use big stitches to keep it easy. Make the stitches an inch away from the edge to allow for unraveling.
2. Position the face pieces on the head. They need to be far enough from the top to leave room for the hat, and far enough from the bottom that they don’t get buried in the shirt when you attach the head.
3. Hot glue the pieces in place. Remember – its hot and its glue. Keep your fingers away. Put a piece of cardboard in the head to stop the glue from seeping through.
4. Stuff it! The head, the pants, the shirt. Best done outside as this is a mess. Fun, but a mess. Use a tarp if easy cleanup is on your list.
5. Leave some straw sticking out of the sleeves and pant bottoms. Tie with 4 pieces of twine.
6. Pin the pants and shirt together.
7. If you are using wooden supports, this is the time to put them in. Insert the vertical one through the top and bottom of the shirt. Let it stick out the top to support the head. Insert the horizontal one through the sleeves. Twine the supports together into a cross.
8. Tie twine around the bottom of the head, and attach head with pins.
9. Pin or hot glue the hat. Accessorize!


Leave a Reply